Sourdough for Beginners: A Step-by-Step Guide to Your First Loaf
Embarking on the journey of baking sourdough bread can seem like a daunting endeavor, especially for those who have never worked with a live, fermented dough. The process, which involves cultivating a wild yeast starter, managing fermentation times, and mastering the art of shaping, is quite different from standard bread making. However, it is a deeply rewarding practice that connects the baker to ancient traditions and produces a loaf with complex flavor and a beautiful crumb. This guide is designed to demystify the entire process, from the initial creation of your starter to the final score of your bread. It provides a clear, step-by-step roadmap that breaks down each stage, ensuring that even a complete beginner can navigate the sourdough process with confidence and understanding.
The essence of sourdough lies in its simplicity. Just flour, water, and salt are the only ingredients required, yet the possibilities for flavor and texture are vast. The magic is driven by a symbiotic culture of wild yeasts and lactic acid bacteria that live in the starter. This living mixture, when cared for properly, leavens the bread and imparts that signature tangy flavor. While it does require patience, feeding, and attention, the process is not difficult to learn. The key is to understand the principles behind each step and to observe how your dough responds to its environment. This article will focus on the fundamental techniques, providing a solid foundation that you can build upon as you become more experienced. It will walk you through the lifecycle of a sourdough loaf, highlighting the critical points where careful observation and adjustment can make a significant difference.
One of the most important things to remember as a beginner is that sourdough baking is an iterative process. Your first loaf might not be perfect, but it will teach you valuable lessons about fermentation and gluten development. The instructions below are designed to be as clear as possible, but they are meant to be adapted to your own kitchen environment. Factors such as room temperature, humidity, and the type of flour you use will all influence the outcome. Therefore, it is essential to become familiar with the visual and tactile cues that indicate a healthy starter or a well-proofed dough. This guide will describe those cues in detail, so you can learn to trust your senses and develop an intuitive understanding of your sourdough.
Throughout this guide, we will explore the four main stages of sourdough baking: building and maintaining the starter, mixing and bulk fermentation, shaping and proofing, and finally baking. Each of these stages is crucial and builds upon the previous one. We will also discuss common troubleshooting issues and provide practical tips to help you achieve the best possible result. While this guide is comprehensive, it is not meant to replace the guidance of more experienced bakers or advanced resources. Rather, it serves as a reliable starting point, offering a structured approach that you can follow step by step as you begin your sourdough journey. Remember that baking is both a science and an art, and there is always room for personal exploration. By following the steps outlined here, you will acquire the foundational knowledge needed to bake a satisfying loaf and to understand the principles that can lead to consistent, quality bread over time.
In the following sections, we will delve into each stage of the process with enough detail to allow you to bake your first loaf with confidence. We will start with the most exciting and often most intimidating part: creating your own sourdough starter from scratch. Then, we will move on to mixing your dough, understanding the bulk fermentation process, and learning the techniques for shaping. Finally, we will cover proofing and baking, including the essential steps of scoring and steam management. By the end of this article, you will have a comprehensive understanding of the entire sourdough process and be well equipped to bake a delicious, crusty loaf of artisan bread in your own kitchen.
Creating and Maintaining Your Sourdough Starter
A sourdough starter is simply a culture of wild yeast and beneficial bacteria that you cultivate by mixing flour and water and allowing it to ferment over time. This living mixture is the engine of your sourdough bread, providing leavening and flavor. Creating a starter from scratch is a straightforward process that takes about 5 to 7 days. You will need a clean glass or plastic container, a kitchen scale for accuracy, and, ideally, organic or unbleached flour, as they have more of the natural microorganisms that aid fermentation. The process involves a series of feedings, where you discard a portion of the starter and add fresh flour and water. This feeding schedule encourages the growth of beneficial microbes and eliminates any undesirable bacteria.
To begin, combine 50 grams of flour with 50 grams of lukewarm water in your container and mix until no dry flour remains. Be sure to scrape down the sides to ensure all flour is incorporated. Cover the container loosely with a lid or a cloth to allow airflow while preventing contaminants from entering. Let the mixture rest in a warm spot, around 70-75°F (21-24°C). Over the next 24 hours, you may notice little to no activity, which is normal. After 24 hours, feed the starter by discarding half of the mixture and adding another 50 grams of flour and 50 grams of water. Stir well and let it rest again. You will repeat this feeding process every 24 hours for the next few days.
As the starter ages, you will begin to see bubbles forming, and it will start to develop a sour, yeasty aroma. The exact timing for these signs can vary, depending on the temperature and the natural yeast present in your environment. By day 3 or 4, the starter should be showing signs of fermentation, such as a slight rise and a distinct smell. From this point onward, you can begin to observe a more predictable cycle. A healthy starter, when fed, will double in volume within 4 to 6 hours and have a pleasant, mildly sour aroma. If it does not rise, it may need more time or a warmer spot.
Once your starter consistently doubles in volume after each feeding, usually by day 5 to 7, it is ready to use for baking. At this stage, it is considered mature and active. However, you can continue to strengthen it by feeding it more frequently, such as every 12 hours, to increase its activity. It is also important to note that the starter is a living organism that requires regular feeding to remain healthy. Between bakes, you can store the starter in the refrigerator, where it will go dormant and need feeding only once a week or so. To bring it back to activity, you would take it out, feed it, and let it rise at room temperature. The maintenance routine for a starter is simple but requires consistency.
Maintaining a starter is a practice in patience and regularity. When feeding your starter, it is generally recommended to mix equal parts flour and water by weight, resulting in a 100% hydration starter. This is the most common ratio and serves well for most bread recipes. Some bakers prefer a stiffer starter, but for beginners, a liquid starter is easier to manage. It is also helpful to observe the starter’s peak activity, the point at which it has risen the most and is full of bubbles. Using a starter at its peak will yield the best rise in your bread. If you notice a layer of liquid forming on top of the starter, known as hooch, it is a sign of starvation, indicating that it needs to be fed. Simply pour off the hooch, discard a portion of the starter, and feed it. By understanding and responding to these cues, you can maintain a vibrant starter that will reliably leaven your bread.
In summary, creating a sourdough starter is a foundational skill for sourdough baking. It requires minimal ingredients and equipment but does ask for a week of your attention. However, the reward is a self-sustaining culture that can be kept for years, producing consistently flavorful bread. Once your starter is active, you can move on to the next stage: mixing the bread dough. The health of your starter is the most critical determinant of the quality of your loaf, so be sure to plan your baking around feeding your starter and ensuring it reaches its peak activity before mixing.
Mixing the Dough: Autolyse and Adding Ingredients
The second stage in your sourdough journey is mixing the dough. This step involves combining the flour, water, and sourdough starter in such a way that it initiates gluten development and sets the stage for fermentation. A common technique in sourdough baking is the autolyse, which involves mixing the flour and water alone and allowing it to rest for a period before adding the starter and salt. This rest period allows the flour to fully hydrate and begins the process of gluten formation, which contributes to a better crumb structure and texture. Autolyse also makes the dough easier to handle and can improve the volume of the final loaf.
To begin the autolyse, weigh out your flour and water according to the recipe you are following. For a simple beginner loaf, a typical ratio might be 500 grams of all-purpose or bread flour and 350 to 375 grams of water, which yields a hydration around 70 to 75 percent. Higher hydration doughs are less stiff and more challenging for new bakers, so starting at a moderate hydration is advisable. In a large bowl, combine the flour and water, and mix with your hands until no dry flour remains. Cover the bowl with a damp cloth or plastic wrap and let it rest for 30 to 60 minutes. During this time, the gluten bonds begin to form as the proteins in the flour absorb the water, creating a smooth, cohesive mass.
After the autolyse, you will add the starter and salt. The amount of starter is typically 20 to 25 percent of the flour weight, so for 500 grams of flour, you would use about 100 to 125 grams of active starter. The salt is usually around 2 percent of the flour weight, or 10 grams. Adding the starter and salt initiates the fermentation and also helps to tighten the gluten network. Mix these in thoroughly using a technique called a hand mix. Wet your hands to prevent sticking, and with a pinching and folding motion, integrate the starter and salt into the dough. Mix until the starter and salt are fully incorporated and the dough is relatively uniform. This can take a few minutes. Do not to overmix, but ensure everything is combined.
Once the ingredients are mixed, you have created the dough that will undergo bulk fermentation. At this point, it is important to perform a series of stretch and folds, which are a technique used to strengthen the gluten without overmanipulating the dough. Instead of kneading, which can be difficult with the high hydration and wet dough, stretch and folds are gentler and create an extensible and elastic structure. To do a stretch and fold, simply reach under one side of the dough, stretch it upward, and fold it over to the other side. Rotate the bowl a quarter turn and repeat this four times. This completes one set of stretch and folds. You will perform several sets this way at regular intervals during the bulk fermentation.
The mixing process is not a one-time event but rather an ongoing part of the early fermentation. The stretch and folds are crucial for developing the gluten network that will trap gases and give structure to the bread. They should be performed at about 30-minute intervals for the first few hours of bulk fermentation. This might seem like a lot of work, but it is an essential practice for achieving a good oven spring and a light crumb. As you perform the folds, you will feel the dough becoming more cohesive and elastic. After about four or five sets, the dough should have increased in volume and feel more resistant to stretching. It will be smooth and slightly domed, indicating a well-developed gluten matrix.
Understanding the behavior of the dough at this stage is key. If the dough spreads flat and floppy, it may need more folds or time. Conversely, if it is very stiff and resistant, you may have overmixed or your flour has high protein content. The goal is a dough that is pliable yet holds its shape somewhat. For a beginner, it is acceptable if the dough is slightly stickier than expected. The use of wet hands and a bench scraper will help manage stickiness. In summary, mixing the dough is the time to ensure your ingredients are well-blended and to begin the gluten development that will carry the dough through the next long phase: bulk fermentation. Paying close attention to the texture and behavior of the dough during mixing will pay off in the final loaf’s shape and crumb.
Bulk Fermentation: Developing Flavor and Structure
Bulk fermentation, also known as the first rise, is the stage where the dough is allowed to ferment as a single mass before shaping. This is a period of significant chemical activity, where the yeasts consume carbohydrates and produce carbon dioxide and alcohol, while the bacteria contribute organic acids that add complexity to the bread’s flavor. It is during this time that the dough’s gluten structure, developed through mixing and stretch and folds, continues to strengthen and align, preparing the dough to hold gases. The duration of bulk fermentation can vary widely, from just a few hours to overnight, depending on the ambient temperature, the strength of the starter, and the desired flavor profile.
Typically, bulk fermentation lasts between 4 to 6 hours at room temperature, but the dough’s cues are more important than the clock. The process is a careful balance between allowing enough time for fermentation and preventing over-fermentation, which can lead to a collapsed loaf. To monitor the fermentation, you can observe the dough’s increase in volume. It should grow by about 50 to 75 percent, appearing airy and full of small bubbles. Additionally, you can perform the ‘poke test’ by gently poking the dough with a wet finger. If the indentation springs back slowly and leaves a small dent, the dough is ready. If it springs back immediately, it needs more time. If the indentation does not spring back at all, the dough is over-fermented and should be moved to the next step promptly to avoid a deflated outcome.
During the first few hours of bulk fermentation, you will incorporate the stretch and folds as mentioned earlier. These folding sessions not only strengthen the gluten but also redistribute nutrients and temperature, ensuring uniform fermentation. For a beginner, performing four to five sets of stretch and folds at 30-minute intervals is typical. After the final set, the dough should be allowed to rest undisturbed for the remainder of the bulk fermentation. At this point, the dough will feel smooth, tacky but not sticky, and it will have a certain liveliness, with visible bubbles just beneath the surface.
Flavor development is a key outcome of bulk fermentation. The longer the fermentation, the more pronounced the sour taste tends to be, as the bacteria produce more lactic and acetic acids. For a beginner, it is common to aim for a moderate fermentation time to achieve a well-rounded flavor without becoming overly sour. If you prefer a milder flavor, you can reduce the fermentation time or use a smaller amount of starter. Conversely, if you enjoy tangier bread, you can extend the fermentation using a cooler environment or by refrigerating partway through. Temperature control is a powerful tool in sourdough baking. A warmer environment speeds up fermentation, while cooler temperatures slow it down. Most bakers find that a warm spot around 75°F (24°C) is ideal for a predictable rate.
One of the challenges of bulk fermentation is that it can be accidentally overdone, resulting in a dough that is too slack and loses its ability to hold gas. If you notice the dough becoming overly elastic and releasing liquid, it is a sign to speed up the next steps. However, it is better to slightly underproof than overproof at this stage, as you can compensate partly with the following final proof. As you become more experienced, you will learn to recognize the exact moment when the dough is perfectly fermented. For now, paying attention to the visual cues and the results of the poke test will guide you.
Once bulk fermentation is complete, it is time to gently turn the dough out onto a lightly floured surface and move on to shaping. It is important to handle the dough with enough care to avoid degassing it, as trapping the gases will help ensure a good crumb structure. Now we will shift focus from the large-scale dough to individual loaves or one large loaf, shaping it to create surface tension and structure. This stage is called preshaping and final shaping, and it is crucial for the final architecture of your bread.
Shaping, Proofing, and Preparing for the Oven
Shaping the dough is the process of creating a taut outer layer that will allow the loaf to hold its shape as it expands in the oven. Done just after bulk fermentation, shaping degasses the dough minimally and creates a structure that will guide gas retention during the final proof. For beginners, the round ‘boule’ is often the simplest, but you can also form an oval ‘batard’. Regardless of the shape, the principles are the same: create tension on the surface without tearing the dough. The preshape is a loose round of dough that allows the gluten to relax and makes final shaping easier. To preshape, gently fold the dough from all sides toward the center, forming a rough ball. Let it rest for 15 to 30 minutes uncovered or lightly floured.
After the preshaping rest, you will perform the final shaping. This is a more deliberate process to create a strong surface. If making a boule, flatten the dough slightly with your hands, then fold the right side into the center, then the left side, then the top, and the bottom, stitching the seams together. Then, using your hands and a bench scraper, shape the dough into a tight ball by pulling it toward you and pushing the seams on the counter. This creates surface tension. For a batard, fold the dough in a similar manner but more elongated. The goal is a seamless, taut exterior.
Once shaped, the dough must be proofed, which is the final rise before baking. For sourdough, final proofing often happens at a lower temperature, either in the refrigerator or at room temperature. A cold proof, also known as retarding, can last anywhere from 8 to 24 hours. It develops flavor and also makes scoring the dough easier because the dough is firmer. Many bakers find that a cold proof yields a more open crumb and a better crust. If you are planning to bake the same day, you can proof the dough at room temperature for 1 to 2 hours, until it has visibly increased in size and passes the poke test. However, for a beginner, a cold proof can be more forgiving, allowing you to bake when you have time.
To support the dough during the final proof, you can use a proofing basket (banneton) or a bowl lined with a floured cloth. The basket helps the dough hold its shape and also allows air to circulate, which can promote a nice crust. Lightly flour the basket and gently place the dough seam-side up if using a banneton, or seam-side down if using a bowl. Then cover it with a cloth or plastic bag and place it in the refrigerator if cold proofing. The dough will slowly ferment and rise. If you do not have a proofing basket, a clean bowl with a floured tea towel can work as well.
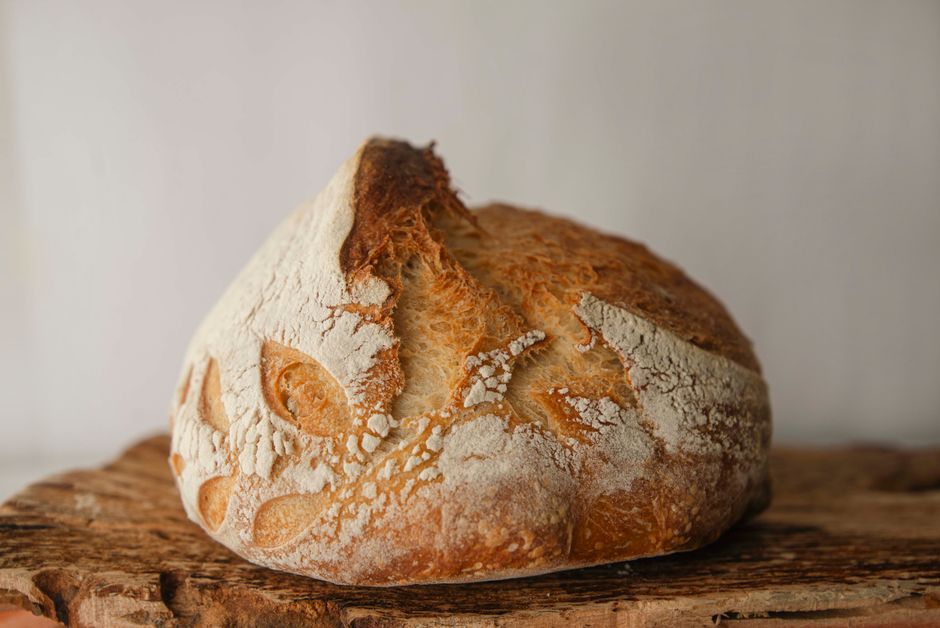
Baking and scoring are the final steps that transform the proofed dough into a stunning loaf. Scoring, making shallow cuts on the top of the dough, is done for two reasons: it controls the expansion of the dough in the oven and also creates an aesthetic pattern. When done correctly, scoring allows the dough to expand without cracking, directing the bread’s ‘oven spring’. This will produce a beautiful ear or a more open crack, depending on the depth and angle of your cuts. Using a sharp lame or a razor blade, make decisive slashes about 1/4 to 1/2 inch deep along the surface of the dough. The angle of the blade matters: a shallow angle of about 30 degrees creates a nice ear, while a steeper angle yields a more open crack.
In the final stage, preheat your oven to a high temperature, typically 450 to 500°F (230 to 260°C). The use of a Dutch oven, a heavy pot with a lid, is highly recommended for baking sourdough because it traps steam from the bread’s moisture, creating a humid environment that helps the crust stay pliable and allows for maximum oven spring. Alternatively, you can use a baking stone with a steam pan at the bottom of the oven. After preheating, carefully score the dough, then transfer it to the hot surface. If using a Dutch oven, place the dough on a piece of parchment paper and lower it into the pot. Cover it and bake for about 20 to 30 minutes. This initial closed bake creates a steamy environment. Then remove the lid and bake for another 15 to 25 minutes until the crust is a deep golden brown and the loaf sounds hollow when tapped on the bottom. It is important to allow the bread to cool completely on a wire rack before slicing. This cooling process allows the crumb to set, and slicing too early can result in a gummy texture typical of undercooked bread.
For those who are just starting, the process detailed above will guide you through your first attempt. It may seem like there are many steps and many opportunities for error, but each step is straightforward and with practice, it will become more intuitive. Baking sourdough is a journey of skill development, and each loaf you make will teach you how your starter, environment, and technique interact. Remember that a good loaf is not only about the final taste but also about the skills you gain and the joy of creating something so elemental with your own hands. So, take your time, follow the guidance, and understand that every step in this process is an opportunity to learn.